Adsense

Image Map

Friday, April 12, 2013

Brown Rice Chicken Stir Fry

Now going on with my healthy food kick I made stir fry with brown rice and vegetables. This is probably one of my favorite meals right now to make, its very simple, doesn't take much time, and is delicious. I also will make enough so that me and eddie will get more than one meal out of it (which by the way it taste pretty good cold too so I was able to take the left overs to eat for lunch the next day) 

What you'll Need: 
- 2 cups of rice
- 1 medium zucchini
- half a red pepper
- one medium onion 
- about a quater cup of teriyaki or stir fry sauce 
- 3 peices of chicken 

First grill the chicken I used my george forman but you can use a normal grill, while grilling the chicken start making the rice as instructed on the box, also chop up the zucchini onion and pepper for the peppers I like to cut them in to cubes and I use thin slices of zucchini becaus they cook quicker when they are thinner, then the onions I chopped into alittle smaller than the pepper (or should I say Eddie chopped because lets be honest I can not chop and onion with out crying and when I say crying I don't mean a few tears but a hysterical cry. I really hope I'm not the only one). 
I then put the vegetables in to a frying pan on meadium heat with some olive oil, I cover it with a lid to let it seam and leave it alone for about 3-5min after that I check it periodically stiring around the vegetables until they are all cooked thuroughly. 
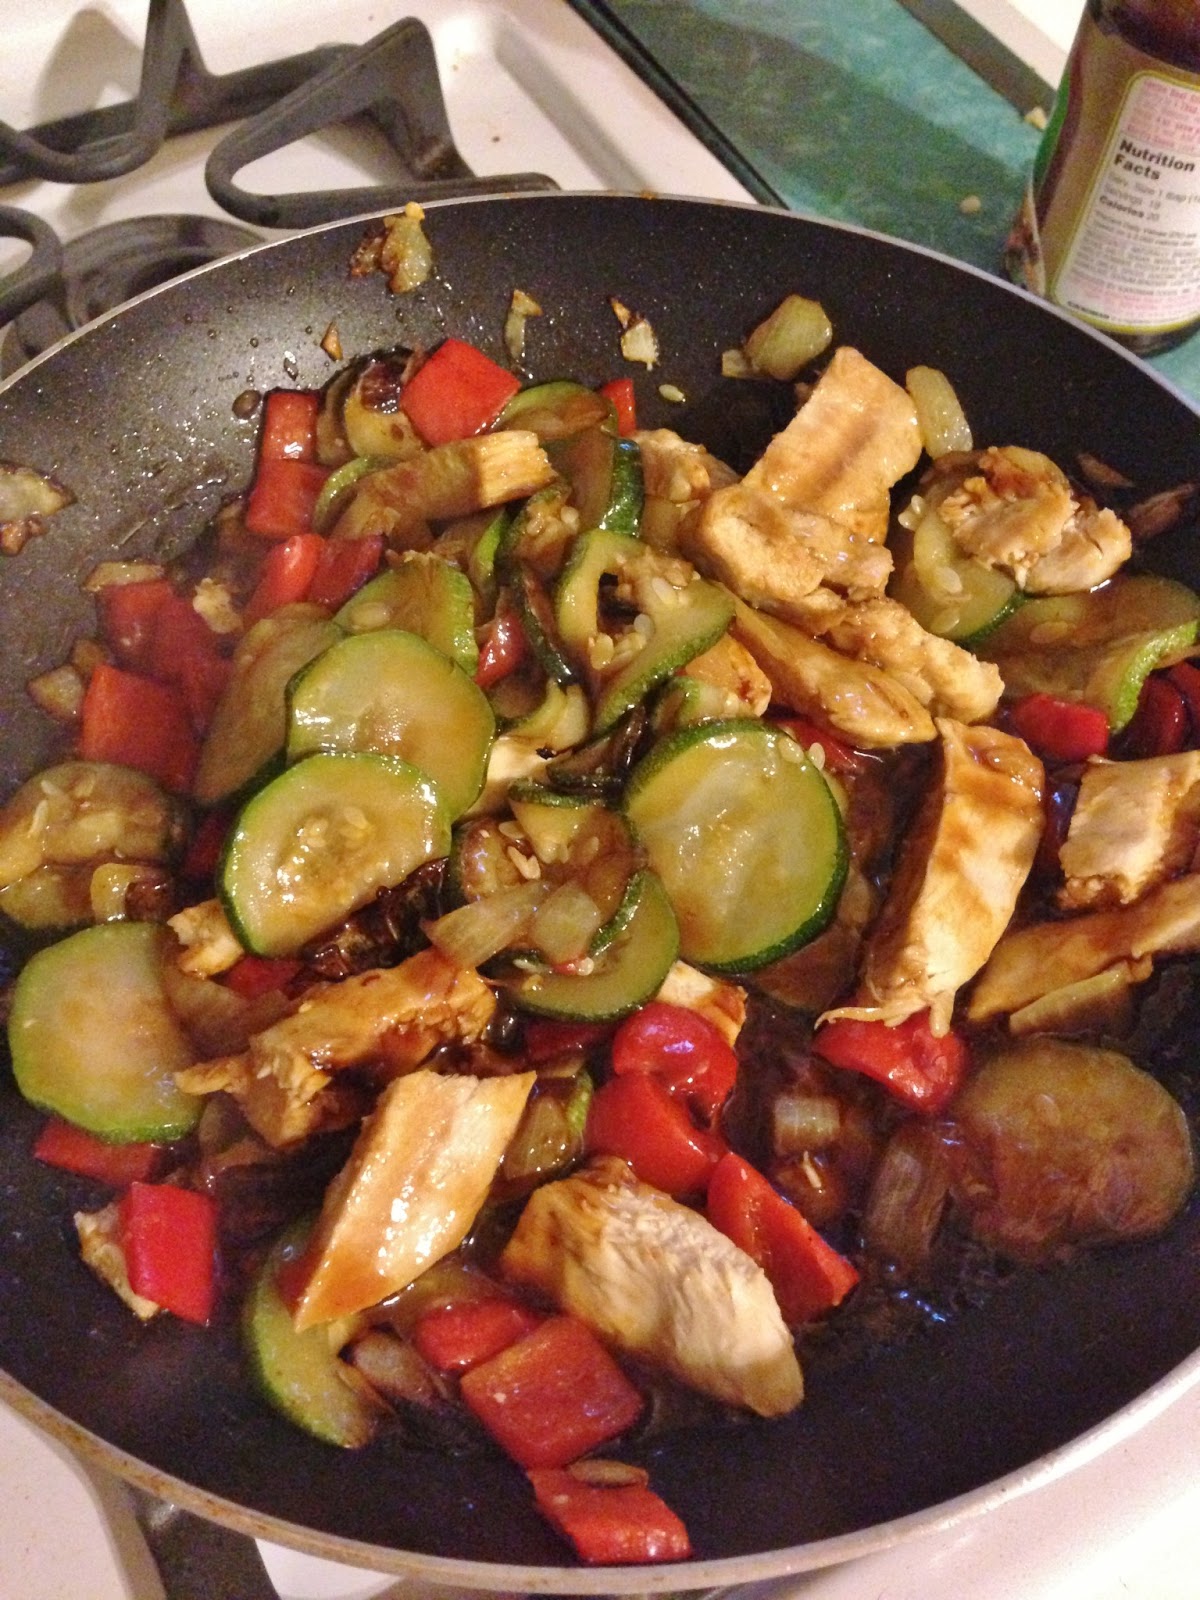
Once the vegetables are all cooked I add the chicken and the Teriyaki sauce and let it simmer for another few minutes. I also add a little bit of teriyaki to the rice. 
Then mix together the rice and the Vegetables and Chicken in a large bowl and serve, I usually will take about half out before I serve and put it in to a tupperware container so that I already have that out and saved  to put in the refrigerator for the next day. 

If you have any suggestions for other ways to make a stir fry or different vegetables that you use let me know in a comment below, I am always willing to try new things! 
Stephanie xx

Thursday, April 11, 2013

A day of Healthy Eating

For the past few weeks I have really been trying to eat healtheir and consistantly healthy throught out the day , yesterday I had a particularly good day of eating (probably because I was at school from 8:30 to 6:30 which doesn't leave much room for snacking) so I decided that I would go through what I ate. I came up with this idea because I was thinking about what snacks to bring for my day and I really struggled, so in this struggle I thought there must be other people who experience the same feeling. So here I am to give some of my snacks and meal ideas to those who are contemplating what should I eat today? 

Breakfast
8:00 AM
- 1 whole egg and 2 egg whites scrambled with some pepper
- 3 large strawberries 

Mid Morning Meal
10:00 AM
- Pear Chobani
and alittle abnormal psychology 

Lunch
12:00 PM 
- Spinach Leaves, half a cucumber, about a handful of low fat feta cheese, and low fat italian dressing
sorry the pictures blury

Afternoon Snack
2:30 PM 
now you may question my palette on this one
- Peanut Butter and Carrots 
I use JIF because they come in nifty little packs :) but I understand people may not be fans of peanut butter and carrots so if you want replace with your favorite carrot dipping condiment, or go just plain carrots which I do some days. 

Dinner
6:30 
- Stir fry with Chicken, Brown Rice, Zucchini, Red Peppers, and Teriyaki Sauce 

Hopefully you can take away a few ideas for you meal and snack plans, let me know if you like this idea/ style of posts in the comments below!
Stephaniexx


Tuesday, April 9, 2013

Pesto Caprese Chicken

Lately I have been trying to eat healthier (the struggle... I want to bake something chocolatey). I am not trying to crash diet or anything because that is horrible for your body, but me and eddie are trying to incorporate more vegetables and a healthier lifestyle. So one of the new recipies I decided to try is this Pesto  Caprese Chicken. 
What you'll need: 
- 2 medium to large Chicken breasts
- about 2 tbls. of Pesto 
- 2 medium tomatos 
- Mozzarella Cheese  
- Salt and Pepper to taste
- Grill/ George Forman
Instructions: 
- Turn on George Forman to 350 degrees and preheat oven to 350 degrees 
- Add salt and pepper to the chicken to personal taste then place on the George Forman and Cook for about 10 minutes or until cooked thuroughly ( may take less time depends on chicken thickness ) 
- While chicken is grilling slice the tomatos in topretty thin slices
- Once chicken is done spread about a table spoon of pesto on each peice of chicken
- Next add the slices of tomatos on the pesto
- Finish by adding mozzarella to the tomato later for this add as much as you like I know eddie likes his very cheesy so I added more for him

- Now place them in a casserole dish or on a baking sheet and place in the oven 
- Bake for about 10 min or until the mozzarella is well melted 
- durring this time I made some chopped spinach or you could be making another vegetable or some whole wheat pasta
This was delicioius and the perfect size dinner for me tonight, eddie had a few chips because he wasn't quite full but next time were going to make some whole wheat pasta to go along with it. 
Hope you enjoyed this recipie and let me know in a comment below if you try it out!
Stephanie xx 

Sunday, April 7, 2013

My Favorite Spring and Summer Nail Polishes

As spring is approaching one of my favorite things to do is brighten up my nail polish and go from the darker colors to so bright pinks and colorful nail polish. For this reason I am going to share with you a few of my favorite spring colors that are in my nail polish collection 
So starting with my pinki is the first color on the left of the first picture (hopefully that makes sense...) So on my pinki is Essie Your Hut of Mine which is a really great shimmery rose color in between and coral and a red I guess I would say. Next on my ring finger is a purple lilac color from Essie which I dont have the exact color name for unfortunatly I have had the color for awhile and beyond just my spring and summer favorites it is definitly one of my all time favorites. On my middle finger is a mint green from Essie called Turquoise and caicos this is another one of my all time favorites. My pointer finger has a light baby blue from NYC called Cashmere and Creme this brand is one of my favorites for inexpensive nail polishes I generally always find a color I like.Lastly is my thumb which is a bright pink from Nars called Schiap this is actually the color I am wearing right now (Even though I really considered keeping this every nail a different color thing, unfortunatly I am not that bold) 
These last two colors are my most recent purchases of nail polish on the left is Sally Hansen Coral Reef which I have been wearing non stop!! (except for right now) and on the right is a metalic blue/teal from Sephora by Opi called Mermaid to Order, this color I really love for going out at night because its metalic and when I go out I tend to wear basic color so this and really all of these colors really add something to my outfits. 
Spring and Summer are my favorite seasons for nail polish so I hope you enjoyed seeing some of my favorite colors. Let me know you favorite spring and summer nail polish colors in a comment below, I am always looking for new nail polishes to purchase. 
Later lovies 

Friday, April 5, 2013

Sweet Potato Fries Yum!

This week as spring is approacing and I am trying to get in better shape for summer I have decided to make some big changes to my diet, as someone who works out regularly my diet is where I struggle. I generally lived a college diet and go out with my friends and eat some pretty crummy food. So this week I have really been working on healthy eating. So on this track I decided to try to see if I could make myself some sweet potato fries. To my suprise they actually turned out pretty good!!
To start off my venture I first peeled my sweet potato so for anyone who has never done this before it is not as easy as peeling a potato let me just tell you that know. I'm sure it gets easier with practice but I deffinatly struggled so make sure you have a good knife to work with. 
Once the potato was peeled I decided to slice mine in half becuase it was pretty big and I didnt want crazy long fries as well as it being very difficult to cut. After this I cut it in to slices and strips of potato about a cm wide and a cm thick. I have always prefered shoe stringy like fries and while they all did not turn out that thin I tried, So if you prefer wedges or steak fries go for it this way just seemed the easiest for me to cut. So once I did this I put them all in a strainer and ran some water over them just to make sure they are washed and I have read that doing this will remove some of the starch from the potatos. Also after you do this make sure you dry them with a paper towel really well 
Once I dried the potatos I transfered them to a small bowl 
To the bowl I added olive oil about 3 tbsp, Some salt and pepper to your individual liking and alittle less than a hand full of bread crumbs. This process would be best if you had a plastic back to shake it all up in however I lacked that unfortunatly so if you are in the same boat as me just make sure that you coat all of the fries pretty evenly. 
Pre baking photo! So I put the oven on to 400 and baked them for 40 minutes. Now as you can see I made some regular potato fries for eddie since he is not a fan of sweet potatoes and they are on the left. And yes I made a ton! I am eating the left overs at the moment actually and they are just as delicious :) 
And the finished products! some delicious fries. 
I hope you all enjoy!! and let me know in a comment below if you decide to try them out. 
Later lovies 

Thursday, April 4, 2013

My Night-time Routine!!


Its Sunny out everyone!!! I am so happy that spring is on its way the birds are singing and it just smells like spring. Now since spring is coming and we all want to look our best as we emerge out of hibirnation, I have decided that todays post is going to be my night time routine, which is what I use to refresh my skin and prepare myself for summer and sunshine, as well as just help me be healthier and happier.

So to start off my evening I take off my make up for the day
For my makeup removal I use Maybllines clean express for my eyes I acutally use a cutip right around my eyes to make sure that I get all of my eye make up off the lashes and my eye liner off, If it sumges I find that okay because you can then use your wipes to get around the eyes with out getting them too close to your eyes. Currently I use Biore's makeup wipes which I find burn my eyes, as almost all make up removing wipes do which is why I use the clean express to get all my eye make up off/ away from my eyes first so then when I use the wipes I dont have to get too close to my eyes. 
After my make up is removed I then use my facial cleanser from Burt's Bees. This is probably one of my favorite facial cleansers I have ever used, mostly because it smells amazing but it also goes on so smooth and just leaves me feeling clean and fresh. So how I use this is I take a towel and wet a corner of it then wash my face, next I take the cream cleanser and apply it all over my face making sure that you work in your t-zone and for me personally my chin area, because these are areas where I find I break out the most. Next I wet that cloth again with warm water and wipe off the cleanser making sure it is all off and just washing your face all over again. Then lastly I take a dry portion of the cloth and dab my face dry. 
Now that your face is clean you need to make sure that your mouth is clean too. So I like to use colgate Optic White in the flaver sparkling fresh mint. I also like to floss and brush my teeth now too, because everyone wants sparkling white teeth for summer 
Now its time to moisturize. I have tried many different moisturizers but I always fall back to this one by Olay. It is their active hydrating moisturizer and you really dont need alot of this at all!! I use about a pea size which is great becuase this bottle will last you forever!!I just apply this all over my face and i find that particularlly my cheeks get really dry so that is where I make sure I focus when applying this. 
 Last but not least I use these two gems from Clinique. The first is acne solutions which I use on just areas where I am breaking out or as a quick spot treatment and it really works! Next Iuse Clinques all about eyes because I have a horrible under eye circles so I use this at night and it does help it almost has a cooling affect on your eyes 
Now that my routine is done it is time to get some beauty rest have a good nights sleep everyone :) 

Monday, April 1, 2013

How to Perogis!

So over the easter long weekend I made perogis among other things with my mom and my cousin. If you are unsure what exactly perogis are the best way I can describe it as polish ravioli but not at all the same and personally I like them better. They can be stuffed with potatos or farmers cheese I prefer potatos. You can also change up how you prepare them, for example I like to put mine in just melted butter, my mom likes to brown her butter in a sauce pan, and my cousin likes to put them in melted butter and brown sugar so it really depends on how you like them. Perogis also are of Polish origin and because they are kind of stressful to make most families make them once or twice a year usually around Christmas and Easter. So how do you make these gems keep on reading to find out! Also the Recipie I am going to provide is to make the potato perogis. 

Perogi Dough
3 cups of flower 
1/3 cup of Vegetable oil
1 cup of warm water 
1 tsp of salt 

So first you are going to mix this dough. We used a Kitchenaid mixer but any mixer should work. Once the ingredients are mixed take the dough and put it in a bowl and cover it with a towel. Let it sit for about a half hour but can sit longer. 
While mixing the dough begin to boil your potatos until they are ready to be mashed. Once they are boiled strain them and amke sure there is no water left 
To just up the anty alittle we make cheesy potatoes! So first add milk, butter and salt to your liking. 
Next comes the cheeses, we used American, Cheddar, and Velveta. Also add those to your liking but generally the more cheese the better in my opinion. Also make sure you mix it well otherwise you will end up with some perogis that arent very cheesey. 
Make sure you let the potatoes cool and then move on to working with the dough
so after the hour it is time to knead and roll out the dough. Use a flat surface and make sure the surface and the rolling pin are flowered well. The Dough Can be seperated in to four pieces before kneading. Knead a few times until it seems not difficult to work with. Know this is mainly because you need the dough to still be alittle sticky but not entirely so that it will seal when you use the  B-I-G maker. Roll the dough out so that it is large enough to cover the maker and is thin so a bit thicker than paper. 
So this is the nifty little maker we used. Also flower this before using. Once your dough is rolled out place it down over the maker and place an oval of potato alittle smaller than the maker in each of the sections. Then roll out a second peice of dough the same size and thickness and place it over the potatoes. Push down the potatoes alittle then roll over the dough with a rolling pin. make sure you can see the red of the maker then remove the excess dough which should peel off easily. Then flip the maker over and the perogis should fall out. Place the made perogis on a baking sheet or some other flat surface that is coverd in tinfoil. 
We also placed some of ours on parchmet paper. Each batch of dough will make about 50 perogis. Once made on to cooking and eating!! Take the perogis and place them in boiling water for about five minutes. You will see them float to the top of the water. Then take them out and strain them to make sure any extra water is draied. I then place them in melted butter but you can eat them as you please :) 
I hope you enjoy your perogis and let me know if you try them in the commets below!
Later lovies